Contents - Index - Previous - Next
Steps 1 & 2
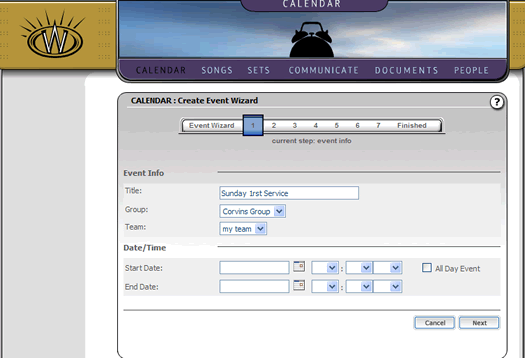
To begin creating your event, first fill out the Title of the event as shown below:
The group and team selections will be made already for you, derived from the context with which you entered the wizard. However, you can change that right now by adjusting those values as you wish.
Next, fill in the start and end date of the event. You can fill in the date textually (as in 9/8/2006) or you can click on the calendar icon, and you will get a mini-calendar pop-up window that will allow you to set the date graphically as follows:
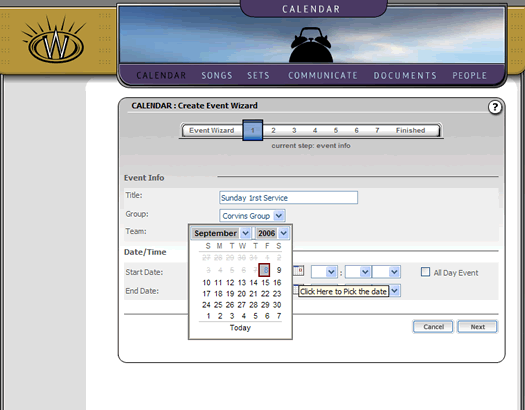
Set the dates and times as you wish. You may select "All Day Event" if that condition is true. To complete the date settings for the event, click the "next" button and you will see the repeat options that are available as follows:
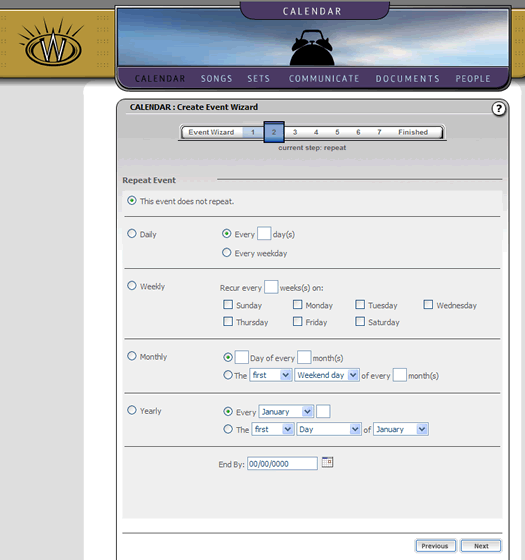
For our example in this tutorial, we are just concerned with a single event. However, as you can see, this event wizard allows you to create recurring events that have a vast number of options available. You are welcome to investigate these as you wish, but for this tutorial we will simply leave the default as a non-repeating event in this case.
Click the "Next" button to continue.