Contents - Index - Previous - Next
Step 4
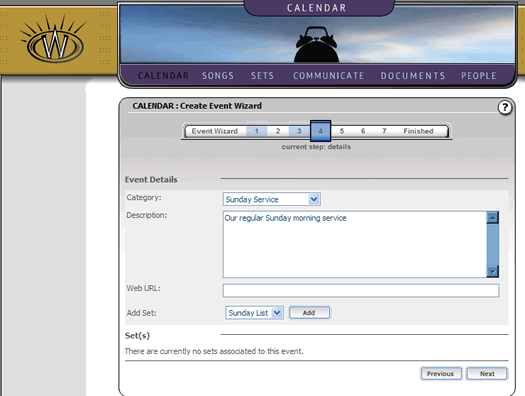
Step four in this wizard covers various optional details you may include in any event. You can select an event category, fill in a summary description if you wish, even enter a URL to an affiliated website related to the event. The form will appear as follows:
One thing you will note of importance is that "Add Set" data that appears in a drop down at the bottom of the form. If you have followed our tutorial through, you will have a set listed in this drop down (as you can see in the screen shot above). Simply chose that set and click the "Add" button to the right of the drop down. The screen will update and you will see the set now listed on the screen as follows:
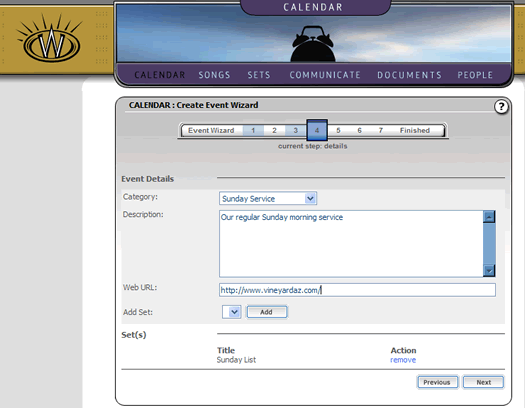
In our tour, we also added a URL to the event. That should be enough detail for now. You should note that everything on this step was optional. You can fill it in if you want, but it isn't required to create an event.
Click the "Next" button to continue.